Thursday, February 14, 2013

Be Mine Sweet Valentine

"To love is to receive a glimpse of heaven."

 -Karen Sunde

Scrabble Letter Fun!

Making Valentine Cards with my girls....
we cut printed scrapbooking paper 4.5 x 5.5

Then we cut card stock 4 x 5

And then we ran the card stock through the Cuttlebug and embossed it with
the Tim Holtz folder from the LOVE collection....

Adding a little swipe of Pixie Pink ink from
the Stampin' Up! collection dressed
up the embossed paper.....

punching two holes through the entire stack of papers
and adding a piece of twine or ribbon
held our project together.....

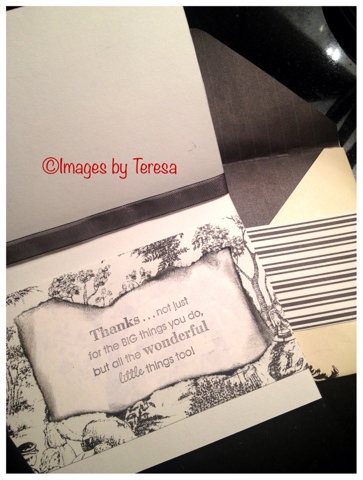
close up of the embossing....

and finally signing the back of the cards and
getting ready for the Valentines Day party....

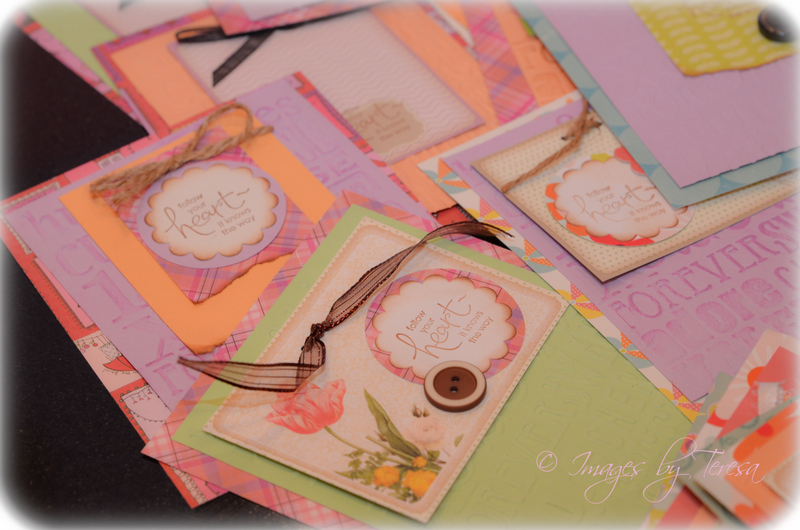
The scalloped punch from Stampin' Up! and their rubber stamp
made for a nice embellishment!

"Follow your heart~it knows the way"

Sharpie fine point perma marker makes a nice writing
tool to sign the back of the cards.....

And Damita gets in on the action!

"live like you mean it"

is a Stampin' Up! stamp too

a little lady bug and button add a touch
of pizzaz!

and look at those nails..... cute manicure for
a day of fun!

and one last glimpse of our batch of cards ....

Hope you enjoyed our little crafting  moment....

Making Valentine cards has become a
family tradition that all
of my children have
enjoyed!


No, in all these things we are more than conquerors through him who loved us. For I am sure that neither death nor life, nor angels nor rulers, nor things present nor things to come, nor powers, nor height nor depth, nor anything else in all creation, will be able to separate us from the love of God in 
Christ Jesus our Lord
Romans 8:37-39


WOW Wednesday over at Cat's..... If you've made it this far, leave me a little luv "comment" and you have a chance to win a prize ~that would be some "blog candy". Cat's Creations randomly picks someone who has commented on blogs that have linked their handiwork to Cat's Creations Blog blog. Go to Cat's Creations for all the details! I just won a last week and it was so much fun I decided to try and link up my page. So we shall see if I succeed in doing so!  


Go and make some melodies with those you love today!
Till my coffee cup and mouse meet again,

Teresa

Tuesday, February 12, 2013

Rolled Sugar Cookies


Rolled Sugar Cookies

Old Fashioned Teacakes

My dear friend Jean shared this yummy cookie recipe with me years ago. Nancy, Jean and I would bake up dozens and dozens of these cookies and help our kids decorate for hours! It became one of our Christmas traditions. Pretty sure they ate more than they decorated! Recently I blew the dust off of this forgotten gem and decided to make these for Olivia's class. It was her birthday and she wanted to take something to share with all of her friends. Dear me I had forgotten how long it takes to make these! Needless to say they were a big hit with the students and the teachers! Be sure and allow a few hours to finish up this project. Enlist some help because conversations that happen in the kitchen can be the best part! Some traditions are worth sharing with the next generation of young people! Bake up some love this Valentines Day! Real butter and cream make these melt in your mouth! 

Cream:
1 cup butter
1 cup sugar

Beat in 1 egg
3 T. Cream or milk (more if needed)
1 t. vanilla

Stir in :

3 cups unsifted flour (all purpose)
1 - 1/2 tsp baking powder
1/2 tsp salt 

Chill dough for easier handling.

Preheat oven to 400 degrees

Roll out dough, one-third at a time, on floured surface to 1/8" thickness. Cut into desired shapes and place on ungreased baking sheets. I prefer to use parchment paper!

5-8 minutes or until lightly golden brown.

Frosting:
1/4 cup butter
1 tsp vanilla
1/4 tsp salt
3 1/2 - 4 cups powder sugar
1/3-1/2 cup milk or half n half

Cream butter, add vanilla, salt and sugar and milk. Alternate milk and sugar and beat until smooth and of spreading consistency. You can thin with a little bit more milk if you need to.

Be sure to sprinkle on the sprinkles as soon as you ice a cookie. The sprinkles will dry into the frosting and for the most part stick! We allowed the cookies to set for a couple of hours before placing into the baggies!

Optional : add orange & lemon extract


the mustaches were a bit tricky getting straight on the pan
and the tips really cooked fast....but, too cute!


another shot....


bow ties and lips too! 


We put four little cookies in a snack size ziplock bag...
it was perfect for her to hand out to her friends....
Notice the lips on the ribbon!? I found that
at Cat's Scrapbook Store last week at
her 75% off sale!! Whoop!!


Olivia off and running with her basket of goodies....


one last glimpse of the cookies..... and the one
picture I did not capture was my husband holding
a mustache up to his mouth and acting totally
out of character.....!!!! I begged him to do it again
and he quickly gobbled up the cookie and
fled out of the room! You will just have to use
your imagination!


Go and make some melodies!

Till next time my coffee cup and mouse meet.....

Teresa


In the sweetness of friendship let there be laughter, and sharing of pleasures. For in the dew of little things the heart finds its morning and is refreshed. ~Khalil Gibran


Monday, February 4, 2013

Snowballs in the Kitchen

Snowball Cookies

YIELD: about 30 very small cookies or about 19 Texas size cookies
PREP TIME: 20 minutes (10 minutes if your fast)
COOK TIME: 15 minutes

INGREDIENTS:
1 cup unsalted butter
1/2 cup confectioners' sugar
1 teaspoon pure vanilla extract (Mexico vanilla is our favorite)
2 1/4 cups all-purpose flour
1 cup chopped pecans (Texas brand)
1/4 teaspoon kosher salt (or Morton will work)
1/3 cup confectioners' sugar, sifted - for rolling cookies

DIRECTIONS:
1. Preheat oven to 350 degrees F. Line a baking sheet with parchment paper.

2. In the bowl of a stand mixer fitted with the paddle attachment or in a large bowl with an electric mixer, beat the butter and 1/2 cup of the confectioners' sugar until smooth and creamy. Add in vanilla extract and mix until combined.

3. Mix in the flour, pecans and salt. Mixing until just combined.

4. Roll about 1 tablespoon of dough (mine are a bit larger, see notes below) into balls and place on prepared baking sheet. The cookies can be placed quite close together since they do not spread during the baking process.

5. Bake in preheated oven for about 15 minutes – taking care not to over bake. Allow cookies to cool on baking pan until you are able to comfortably hold them in your hands.

6. Sift 1/3 cup confectioners’ sugar into a medium bowl. While cookies are still warm, roll them in confectioners' sugar. Place cookies on cooling rack, once they have cooled completely, roll them in confectioners' sugar again.

NOTES:
These rich little cookies are extra-special when made with macadamia nuts.

To ensure recipe success, do not use self-rising flour or vegetable oil spreads in this recipe.

If salted butter is all you have on hand then omit the salt.

Make it your way. Toasted Coconut Tea Cakes are a special treat for coconut lovers. Toast 3/4 cup coconut by baking uncovered in an ungreased shallow pan at 350°F for 5 to 7 minutes, stirring occasionally, until golden brown. Let coconut cool before adding to the dough.

The 1979 Betty Crocker cookbook has a version called "Ambrosia Balls" -  Follow the Russian Tea Cake recipe except swap out the nuts for 1 cup flaked coconut and add in 1 tablespoon of grated orange peel. So Yummy!


The cookie balls are ready for the oven.....


Out of the oven and dusted with yummy white powder sweetness.....


Really Mom, You have to take a picture before we can eat them?!


Melt in your mouth goodness.......

Baking up some sweetness for those we love,

Till next Time,

Teresa


"Behave so the aroma of your actions may enhance the general sweetness of the atmosphere." 
-Henry David Thoreau

Friday, February 1, 2013

Creating Cards in the Kitchen

I promised a variation of posts and I will let you in on a little secret. This is a fun way to share a little of my world and even share a few tidbits of encouragement along the way.

We have started putting our life back in order after the big kitchen remodel and I have been longing to do a few creative things with paper and scraps. I have devoted one, well make that two of my kitchen drawers to the bare bones of card making supplies. After the kitchen is clean and the girls are winding down with showers and homework I have been making a couple of cards each evening.

Just stealing away for 30 minutes to expend a little creative juice has been energizing me. I know that probably sounds silly. The homework, the games, the running, the laundry, the cooking, the cleaning, my work, and all the other things I do sometimes leaves me with no me time! The convience of the scrapbooking tools in a handy spot has inspired me to stir up that creative energy.

A few years ago my friend Linda got me hooked on making my own envelopes. Honestly I am just slightly devoted to the concept.  Lining the envelopes with fun cordinating paper lends to a nice finished touch. Through all the different fads, styles, and years of scrapbooking I have collected a fun array of goodies.  I kinda grimace at the thought of tossing in the trash any tidbits of scraps because I can see them on a card. Over the past few years my passion has grown in making cards and envelopes. Perhaps it is because I don't have to think too hard!

And one might ask what do I do with all of my cards. One of my favorite things is giving them away as sets. I have purchased tin cans or repurposed a cute tin can and filled it with a set of all occasion cards and tied a pretty ribbon around them. Sometimes I just put a few in a cellophane bag or a cute box and add a neat gift tag or ribbon. Did I mention Keno? Great for that crazy girls night out activity!

One of the most fun places they have landed is in the hands of my daughters school teachers. Who doesn't need a card now and then? Their teachers have always seemed very appreciative. And as for me personally it has been fun having my basket stashed with cards for what ever occasion arises! I recently had to stop by the local drug store and pick up a couple of cards because in my haste I forgot to  grab some out of my basket. Geez was I shocked at the price of a card today!

Creating cards for our friends and family is a great way to say I love you! Hope you get a few ideas. I do apologize for not listing all of the supplies and papers and step by step instructions. I know there are some wonderful blogs out there that do that and my hat is off to them. Perhaps I will give it a try one night. In the meantime enjoy the visual feast of my randomness in card creations! Maybe, just maybe you may see something you can lift!


CARD #1 - front


CARD #1 - Inside


CARD #2 - Front (the "sparkle" is an extra fold)


CARD #2 - Inside


CARD #3 - Front


CARD #3 - Inside (just love using eyelets)

CARD #4 - Front and oops no inside pic for this one!


CARD #5 - Front


CARD #5 - Inside (notice the stripe paper on the back of the envelope)


Card #6 - Front (notice that striped paper? that is a strip of paper that I folded kinda like a paper fan....really not a hard concept, but just in case Cat should ever read my blog and see this I will give credit where credit is due! Her classes really rock and she has great teaching skills! True card confession time .... I had to have my own private lesson before I caught on to this really complicated paper folding tecnique!


Card #6 - Inside ( I left the inside of this card blank so it could be a note card and the tag is loose and laying on the inside with some encouraging words, but then can easily be used for a bookmark)


Thank you for stopping by my blog ......
till next time,
Teresa

"A friend is one to whom you can pour out the contents of your heart, chaff and grain alike. Knowing that the gentlest of hands will take and sift it, keep what is worth keeping and with a breath of kindness,  blow the rest away." -unknown